Batch Process Files (Business/Site License Only)
Using the "Batch Process" dialogs you can work with multiple files at the same time. After pressing the "OK" button you can see the details of the processing. You can cancel the processing of files using the "Cancel" button. You can perform three action using the batch process dialogs:
- Convert Images to Icons or Cursors
- Convert Icons or Cursors to Images
- Extract Icons or Cursors
- Group Images to Icons
- Batch Process
Convert Images to Icons or Cursors
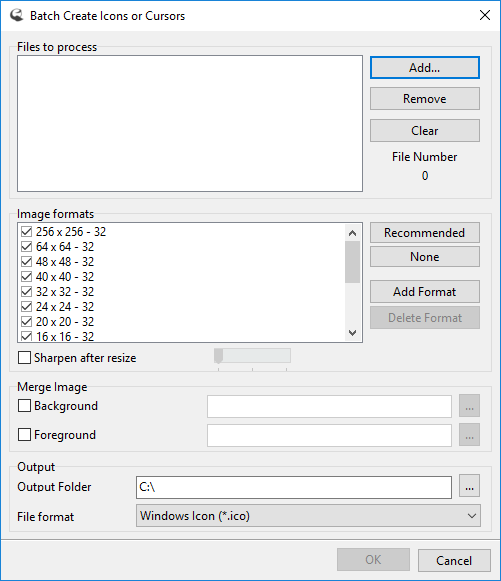
Using the "Batch Create Icons or Cursors" dialog you can create icons or cursors from images. You can start the dialog using the "Tools/Batch Create Icons or Cursors" menu item.
Batch create icons from images
In this dialog you can convert the images to icons. It can also convert icons to icons. You can use this mode to convert Macintosh icons to Windows icons or vice versa. You can remove image formats from icons or add new ones.
In the "Files to process" group box you can add the files to work with. Using the "Add" button you can add additional files to the list. Only those files will be added to the list, that are allowed by the selected action: images and icons. Using the "Remove" button you can remove the selected files from the list. The "Clear" button will remove all the files from the list. Under the buttons you can see the number of files in the list. If you want to convert Gif files to icons, and the Gif file contains more frames, then the first frame is converted.
In the "Image Formats" group box you can specify which image formats to include in the icon. This will be filled automatically with the recommended image formats based on the choosen output file format. You can also add/remove custom image formats using the "Add Format/Delete Format" buttons.
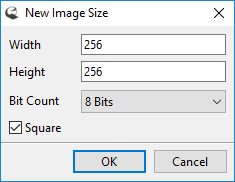
Add custom image formats
Using the "Hot Spot" button you can configure the hot spot if you save to a cursor format.
If you check the "Sharpen after resize" checkbox then the resized images inside the icon will be sharpened. You can also select the amount of the sharpen filter.
In the "Merge Image" group box you can specify a background and/or a foreground image. The background image will be merged behind the icon image. The foreground image will be merged on the icon image as an overlay. Using this feature you can quickly create icon sets by creating a background image and batch processing more symbol images at once. This way all the created icons will have the same background image, but a different symbol on it.
In the Output part of the dialog you can select the output folder for the result files, and you can specify the output file format:
- Windows Icon- the results will be stored as Windows icons
- Macintosh Icon - the results will be stored as Macintosh icons
- Windows Cursor - the results will be stored as Windows cursors
- Animated Cursor - the results will be stored as animated cursors
Convert Icons or Cursors to Images
Using the "Batch Create Images" dialog you can convert your icons or cursors to images. You can start the dialog using the "Tools/Batch Create Images" menu item.

Batch create images from icons or cursors
Using this dialog you can convert the icons, cursors ot IFX files to images. Each image format inside the icon will be a separate image file. You can use IFX files, Windows or Macintosh icons and static or animated cursors. You can even export animated cursors to animations like gif or apng.
In the "Files to process" group box you can add the icons to work with. Using the "Add" button you can add additional files to the list. Only those files will be added to the list, that are allowed by the selected action: icons, cursors and IFX files. Using the "Remove" button you can remove the selected files from the list. The "Clear" button will remove all the files from the list. Under the buttons you can see the number of icons in the list.
In the Output part of the dialog you can select the output folder for the result files, and you can also specify the output file format of the resulting image. You can choose between bmp, jpg, gif, png, jp2, tif, xpm, apng or ifx.
↑ Top of PageContentExtract Icons or Cursors
Using the "Batch Extract Icons or Cursors" dialog you can extract the icons or cursors from exe or dll files. You can start the dialog using the "Tools/Batch Extract Icons or Cursors" menu item.

Batch extract icons or cursors
In this batch dialog you can extract all icons or cursors from the given files. Each extracted icon will become a separate icon file. The batch extract will extract the icons exactly as they are in the file. You can extract from all kind of Windows files: exe, dll, ocx a.s.o. If it contains an icon it will be extracted. The batch extract can also extract icons from Macintosh resource files (Macintosh Resource Fork (*.res, *.rsrc)). It can handle also Macintosh resources that are inside MacBin, AppleSingl or AppleDouble files.
In the "Files to process" group box you can add the resource files to work with. Using the "Add" button you can add additional files to the list. Using the "Remove" button you can remove the selected files from the list. The "Clear" button will remove all the files from the list. Under the buttons you can see the number of files in the list.
In the Output part of the dialog you can select the output folder for the result icons. You can also select the resource type to extract:
- Icon - The icons will be extracted from the selected files
- Cursor - The cursors will be extracted from the selected files
Group Images to Icons
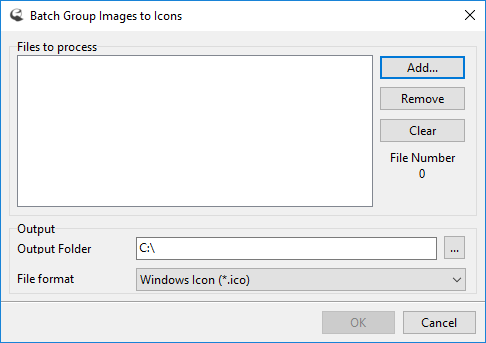
Using the "Batch Group Images to Icons" dialog you can group similar named images into icons. You can start the dialog using the "Tools/Batch Group Images to Icons" menu item.
Batch group images to icons
It will group images with similar names into an icon, and will not add any additional image formats to the icon. The size of the image will not be changed. File names are considered similar if the letters (except the numbers, special characters and @2x) are the same. The comparison is case insensitive. For example the following files will be combined to an icon:
- Image 256x256
- Image 16x16 @2x
- Image 32x32-4
- 2-image
- IMAGE2
In the "Files to process" group box you can add the icons to work with. Using the "Add" button you can add additional files to the list. Using the "Remove" button you can remove the selected files from the list. The "Clear" button will remove all the files from the list. Under the buttons you can see the number of icons in the list.
In the Output part of the dialog you can select the output folder for the result icons. You can also select the icon type: Windows or Mac.
↑ Top of PageContentBatch Process
Using the "Batch Process" dialog you can apply actions to existing images. You can start the dialog using the "Tools/Batch Process" menu item.

Batch group images to icons
You can learn more about actions here.
If you process icons of other images that contain multiple images and you want to apply the action on all images then make sure that the "Options/Apply Adjustments to All Layers/images" option is checked. If it is not checked then the action will be applied only to the first image.
In the "Merge Image" group box you can specify a background and/or a foreground image. The background image will be merged behind the icon image. The foreground image will be merged on the icon image as an overlay. Additionally you can also specify a mask image that will be deleted from the image.
In the Output part of the dialog you can select the output folder for the result images
↑ Top of PageContent